Well this is still only 2 coats so far. I have about 3 more to go, but putting the poly on is not that hard at all. With the applicator it goes on real smooth and dries very quickly.
Showing posts with label flooring. Show all posts
Saturday, May 30, 2009
Monday, May 25, 2009
Shellacking is done
Well I finished shellacking the floors and they came out very nice. Even though the new wood and old wood don't match, I'm not going to cry over it. Now I have to wait to put down the poly, which I will probably do next weekend when I can get some from my local paint store.
Question: what brands of poly have people used? And how good were they?
Before:

After:

Question: what brands of poly have people used? And how good were they?
Before:
After:
Saturday, May 23, 2009
Wierd find under the floors... and rot
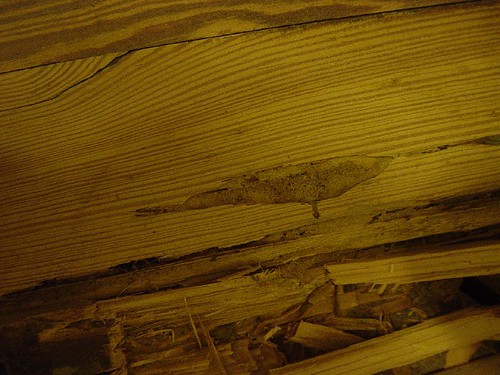
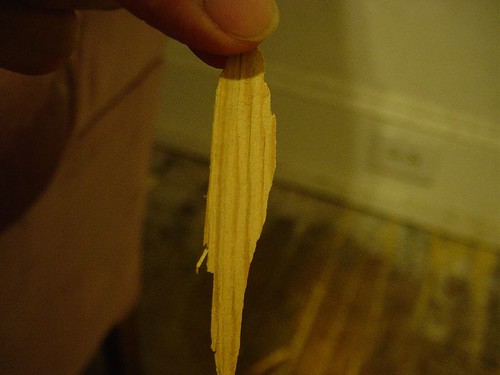
I am in the process of redoing the old downstairs room, which was originally a kitchen. To start off I had to pull up all the old original floors because they were in such bad shape (alot of rot from a former leak I presume). Anyways while I ripped up the plywood to get to the original floor, I found what looks like old linoleum and newspaper bits. It was kind of weird to see the newspaper, the linoleum had a 1950's design on it.
You can see the small newspaper piece in the second photo, there wasn't much left of it, so no telling how old it is. I assume that it was put down and then the linoleum on top. Anyways it's pretty cool to see.
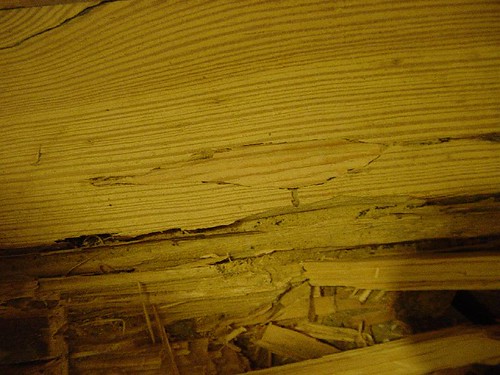
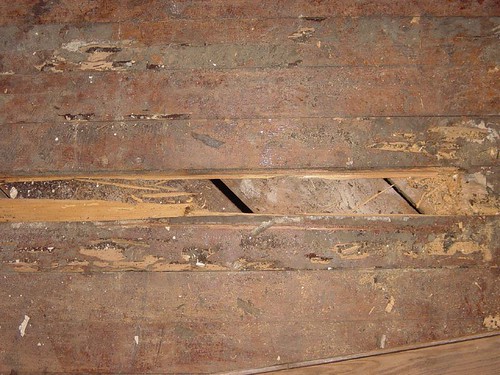
The other thing I found was lots of rot. Some of the floor boards were pretty wrotten, but most was still in useable shape. I will have to put some piece of plywood in its place and then put big sheets of plywood on top.
Thursday, November 22, 2007
Happy Thanksgiving with a little bit of shellac pictures
Happy Thanksgiving everyone!!! I hope you all have a great Thanksgiving and gorge yourselves with turkey and stuffing, I know I will but before we do that I have fulfilled my promise in posting some pictures of my floor. Now it only has 3 coats of shellac so far and I am going to put about 5 or 6, so it is not done yet, but you can see what it will look like.
This is during the sanding, I rented the U-sand instead of the drum sander. This made sure there were no gouge marks, but it did take a lot longer to sand. I purposely left dark areas and any character marks in the wood.
This is after a couple passes, for some reason my camera was crappy and didn't want to take any good pictures.
This is with the first coast of shellac. I initially thought I was using a 1 pound cut, but after some calculations I figured out I was using a 1/2 pound cut. No wonder it was so easy and didn't create any lap marks. Anyways again the camera didn't give me a good picture. You can see the hazy spots in the picture, I think the inside lense is dirty somehow and have no idea how to clean that. I might just get a new camera on Friday, which reminds me, if anyone needs an excel spreadsheet of all the deals on Black Friday, let me know.
And here is after the second coat, you can see it is a lot darker. My wife wants it dark, so I will have to do a few coats I'm sure. I let the dogs have a test run on it and after awhile I did see that they would start scratching it up a little, so I took out some shellac and blended it out, but because I used such a thin cut of shellac, it couldn't protect the actual wood and I saw where there was a claw mark in the wood that I couldn't take out. The scratch was gone, but the dent wasn't, So it looks like a few more thicker coats should help.
Monday, November 19, 2007
I'm a SHELLAC MANIAC!
Well this past Saturday I went to Home Depot and rented the U-Sand. I decided on this instead of the drum sander, because it would be more forgiving and I wouldn't have the chance of destroying my floors. The U-Sand was pretty straight forward it had 4 orbital sanders on the bottom (which you have to replace each sandpaper with) and you just push it and pull it. It was very easy, but took a lot longer then the drum sander. I needed every bit of the 24 hours to sand my floors. Even then I didn't completely get every area, but it was better than having to use an edger as well. I made sure that I didn't sand away all the marks and dings that made my floors old. So I sanded lightly to get the old shellac off. I will have to post pictures later, but I like the look of the dark edges and the lighter areas in the middle, it kind of kept the antique-ness of the floors. After I finished that I vacuumed like a demon and made sure that there was no dust anywhere.
On Sunday I started my first coat of dark garnet shellac, if you read my previous post then you know I got my shellac from shellackshack. Making the shellac was simple. I had a glass mason jar and put 32 ounces of denatured alcohol I then put in 1/2 cup of shellac. I think this makes it a 1# cut. Either way the shellac dissolved and the jar was totally black, you couldn't see through it at all, I guess that's how I knew that the shellac was indeed dark garnet. So I made a couple batches of that and let it sit a few days (just so you are for certain that everything has dissolved). So on Sunday I tried it out, and boy was I surprised at how it looked. It made the floors glow. My wife wants it darker but I am assuming the more layers I put on the darker it will get. I decided to try a 1 # cut because I heard if you do to high a cut that brush marks would appear easily. The 1# cut worked well and I had no visible lap marks that I could see, so I might had to go up to 1.5 or a 2 # cut and see if I can get it a little darker. Overall I am pleased and hopefully the floors will hold up well. My wife has been beggin me to finish the living room by Christmas, so we could put the tree there instead of on the second floor landing. I guess her wishes have come true. Next floor to shellac will be the master bedroom. I will pot pictures later on how it turned out.
Thursday, February 22, 2007
Question about wood floor refinishing... Damn animals!
Well I have decided that moving into the master bedroom is a must now. We have lived in the small guest bedroom ever since we moved into our house. The room is painted and livable, but the question I have is, "What should I cover my floors with?". I know a lot of people would sugguest polyurethane. And I bet that is a good solution, but listen to me first. I have 5 dogs, ranging from 3 tiny chihuahuas and 2 big black labs. They do a number to my floors everyday and with poly I am afraid that I will have to refinish every few year. I know the plus side is that it is very durable, but then the bad is that you can not fix it after it has been damaged. I have read a lot about shellac and have written a few things about it on my blog. The plus is that it is easy to spot repair and dries a lot faster, the bad is that it is easily damaged. I won't even go into the n-th number of other floor finishes either. So if you could please put your input on what I should use. I will take what you say and make my decisions.
Remember: I do have to stay in the house as the floors are being refinished. Please help. Thanks so much.
Friday, December 22, 2006
The Return.....
Well it has been quite some time since I last wrote anything, but I am finally back. Well for now at least. I guess after the debacle my FSU Seminoles have been having, I just couldn't get up to write anymore. But since the season is over (which actually ended about 4 months ago) I can go back to writing about my house.
Since I last left off there has been no real changes. I did prep the master bedroom for paint, which it hasn't been painted yet. I have also replaced the bad floor boards that I have in the living room. I thought this job would be hard, but I found out that it wasn't as bad as I thought. The worst part is finding replacement heartwood pine flooring. I'm lucky enough to have some dumbass neighbors who buy historic homes and just rip out everything inside and throw it out. As you can tell I have been dumpster diving a lot. I also found 2 old sinks from different eras. I'm not sure how old they are, but they have openings slotted with 2 faucets for hot and cold. So I can only assume they are old. Back to the flooring. Another thing that was difficult with replacing the wood flooring was cutting out the bad parts. I could have done it the easy way and just ripped out the whole floor board, but I wanted to save as much flooring I could, so that meant squaring up and cutting the floorboard while it was still on the ground. Let me tell you that was hard, I could never get a good perpendicular cut. And when I did get a good cut, using the chisel was horrendous. I found that putting a saw blade on my dremel was the best way of getting a good cut.
When I finally got everything cut to size and installed the new old floorboard, I ended up with space between the new and the old floors. The new floorboard I had was about 1/16th skinnier in width. I though it wouldn't make much of a difference, but after putting it in, you could see the spacing so well. Solution: Use a broom or brush and brush the sawdust that will no doubt be there into the crevices. I forget where I got that idea, but I think it was on someones blog. That worked like wonder. Now all I have to do it complete the other floorboards, sand the floors and then put some shellac on them. Yes folks you heard right, I am going to shellack these damn floors, but that will be another day. Until then Merry Christmas and send me some money.
Since I last left off there has been no real changes. I did prep the master bedroom for paint, which it hasn't been painted yet. I have also replaced the bad floor boards that I have in the living room. I thought this job would be hard, but I found out that it wasn't as bad as I thought. The worst part is finding replacement heartwood pine flooring. I'm lucky enough to have some dumbass neighbors who buy historic homes and just rip out everything inside and throw it out. As you can tell I have been dumpster diving a lot. I also found 2 old sinks from different eras. I'm not sure how old they are, but they have openings slotted with 2 faucets for hot and cold. So I can only assume they are old. Back to the flooring. Another thing that was difficult with replacing the wood flooring was cutting out the bad parts. I could have done it the easy way and just ripped out the whole floor board, but I wanted to save as much flooring I could, so that meant squaring up and cutting the floorboard while it was still on the ground. Let me tell you that was hard, I could never get a good perpendicular cut. And when I did get a good cut, using the chisel was horrendous. I found that putting a saw blade on my dremel was the best way of getting a good cut.
When I finally got everything cut to size and installed the new old floorboard, I ended up with space between the new and the old floors. The new floorboard I had was about 1/16th skinnier in width. I though it wouldn't make much of a difference, but after putting it in, you could see the spacing so well. Solution: Use a broom or brush and brush the sawdust that will no doubt be there into the crevices. I forget where I got that idea, but I think it was on someones blog. That worked like wonder. Now all I have to do it complete the other floorboards, sand the floors and then put some shellac on them. Yes folks you heard right, I am going to shellack these damn floors, but that will be another day. Until then Merry Christmas and send me some money.
Friday, May 05, 2006
Patching and removing wood floors
Well today I decided to pull up some of my wood flooring that had been damaged by termites. I went online and read a few articles on the 'how to do's' of replacing floor boards. It seemed easy enough, drill a few holes and then use the handy circular saw to cut a few lines down the board, then you just pry up and voila - a hole in the floor! In reality, I drilled the holes, then used the circular saw only to hit the nails that were used to secure the floor boards in the first place. Then after totally screwing my circular saw, I tried to pry the board up. Too bad the board came up in only pieces and I had to scrape and dig to get every bit out. Even then I still need to use a chisel to straighten the good board with the holes I drilled in. But eventually I got a few boards up. Now onto the successful part of the day. Patching holes that termites made. WOOHOO! Well after the tremendous amount of time it took to take up one board, I started to dread thinking about pulling up all the boards that have been damaged. So I decided I would try to patch some areas that weren't that badly damaged. I took a piece of wood that I had previously pull out and I started to scrape it into the shape I needed to patch the board with. The area isn't all that big, so it was a good practice piece. It didn't take long to shave off a little at a time until I got the right size. After I was done, I just plopped the sucker into the hole and I was pretty happy with the end results. Here are some pictures of the wood pulling and patching. Enjoy!


Tuesday, May 02, 2006
Anyone know where I can get old flooring?
Well I am almost complete in stripping the old glue off my living room floor and am getting ready to sand afterwards, but before I do that I need to get some replacement flooring for my floors. Some of the wood peices have been eaten away by those darn pesky termites. I can't wonder why God ever decided to make those things, I'm assuming it was actually Satan himself who created these buggers. He loves to enjoy watching us new old home owners rip up the carpet only to find millenia linoleum under it. Then pull that up only to find that the wood flooring under that has been ravaged by his creations. Anyways I was wondering if anyone knew of a website or some place in Florida where I could get salvaged old wood flooring. Mine are 2.5 inch old heart pine and I want to finish them with some shellac or maybe poly, depends how old I want to go. But if anyone can lead me to the right direction, I would greatly appreciate it.
Thanks a lot!
Thanks a lot!
Subscribe to:
Posts (Atom)